Search Creating Art

Friday, April 15, 2011

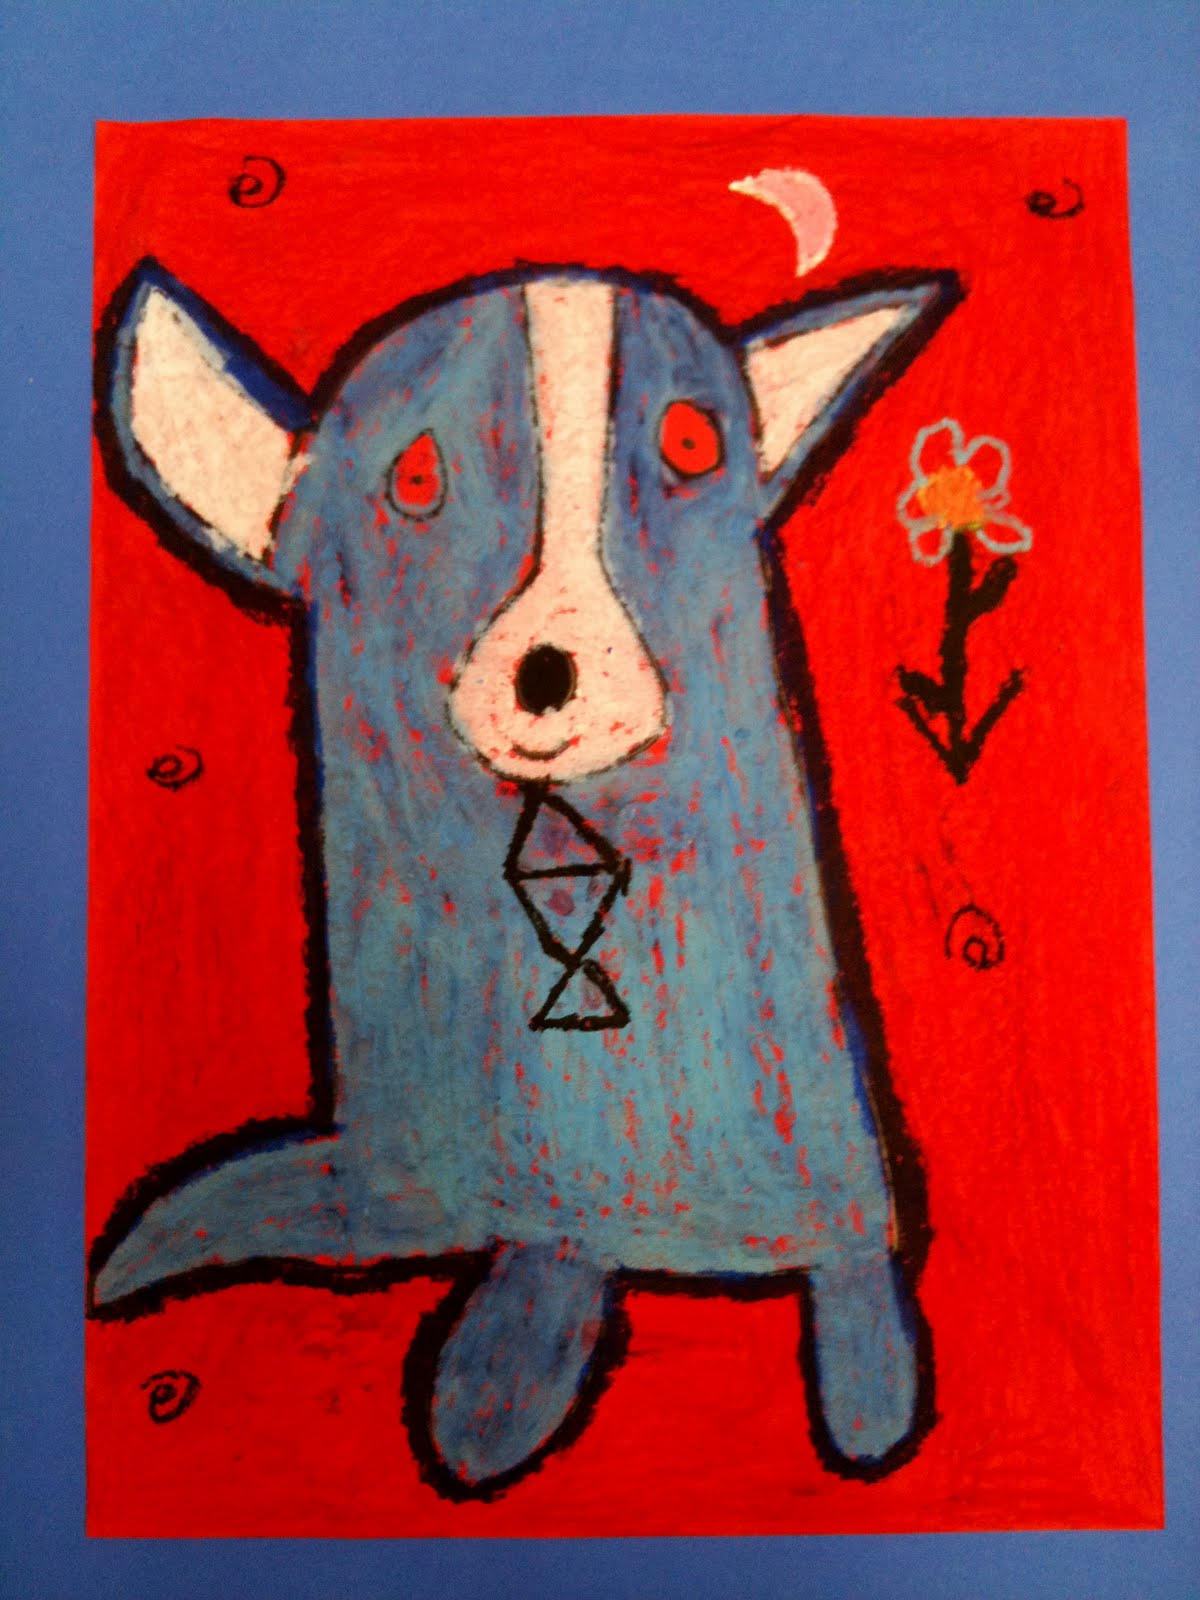
Oil Pastel Dogs Inspired by George Rodrigue's "Blue Dog" Series


4th graders learned about the legend of Blue Dog and how artist George Rodrigue came to paint this subject over and over again.  We looked at some of his paintings and read a short bio on him.  Then students followed along as I demonstrated how to draw the contour line of their dogs.  Once their lines were drawn, students traced over them with a black permanent marker.  They could choose to color in their dogs with any color, but whatever color they chose (be it warm or cool), they were instructed to choose the opposite color family for their background.  Some students veered from those instructions, but the ones that followed them had eye-popping results.  All of their dogs turned out gorgeous and they had so much fun using the oil pastels and creating their unusually bright and colorful canines!


Friday, April 8, 2011

"Under the Sea" Recycled Art/Mixed Media


    This is probably my favorite elementary art project to date...for sure my favorite 1st grade project!  Ocean scenes are a great theme in elementary art, incorporating science into the art curriculum.  I also tied math into this project, by reading a great book by Lois Elhart- "Fish Eyes", a counting book.  Lois' books are beautiful in their vivid simplicity, her artwork uses bold color and simple shapes combined for eye popping visuals.  The students loved the book, and as we read I pointed out the bright, beautiful fish they could get ideas from.  
    The first step in this multi-step project, was to create the ocean water.  Using a 12" x 18" sheet of white sulphite drawing paper, green, white and blue tempera paint and a 1" brush, the students created their ocean water by blending the paint on the paper.  I gave them their paint in one small metal pan...3 blobs of each color paint- they shared a pan to a group table.  I demonstrated for them how to pick up 2 or 3 colors with their brush at a time and then blend them together by brushing them out on the paper.  I emphasized they should not stir the paint in the pan, making it into one color- the beauty of the water was in all the tints of blue and green they could make on their paper.  They were to start at the top, painting from side to side, back and forth all the way down the paper- never painting in another direction.  Once they were done with the water, we set the painting aside to dry.  
    Next came the recycled portion of this project.  Laminating scraps that I had been collecting in the workroom for some time were my inspiration for the fish.  I have been experimenting with many different recyclable materials this year, and laminating scraps were one of the most challenging.  (By the way, if you have any ideas or suggestions for using them, please message me, I would love to have your input!).  I tried to warp them by applying heat from the oven, the microwave, a hairdryer, a heat gun- they are not to be warped!  If only!  Dale Chihuly projects were my first thought, and still are not out of the question, but they would have been easier to accomplish had I been able to warp the material.  I have other project uses for these that I will be sharing in future blogs, but I digress...
    Paint will not stick- at least not water based- I do not use acrylic with my elementary students, though I could with the older grades, and that could probably work.  I wanted to be able to color the plastic, so I kept at it.  I found that permanent markers work beautifully, and I had some with wide tips.  They colored large areas more quickly than a fine tip marker, of course.  So, I made some drawings on the clear plastic scraps and one was a fish...my project was born!
    Once the fish were drawn on the plastic, the students cut them out and we glued them on their ocean scene.  For some fun detail, we used glitter glue on top of the plastic- sometimes this can fall off when it dries, but I had very few incidents.  Overall, the glitter glue adhered nicely and was a beautiful touch.  The project was going to end there, except for a few white oil pastel bubbles in the water, until a student grabbed a colored oil pastel and without my knowing began drawing some sea plants in the water.  When I saw what they were doing I got so excited!  Oil pastels are beautiful on top of tempera paintings...why hadn't I  thought of extending the lesson with that?  My students ALWAYS come up with better ideas and surprise me with their creativity!  So, out went all the trays of oil pastels and the bottom of the ocean came alive!  
    These projects are so impressive and gorgeous!  The students had a blast creating them and were proud to turn trash into treasure!  I told them that I am a proud dumpster diver...especially when it means that we turn something discarded into a thing of beauty.  :)


Wednesday, February 23, 2011

iPad Tray African Masks


When our school received 30 iPads they had recently purchased, I found the computer teacher unpacking the boxes.  As he pulled each one from it's sleeve, they were resting in a black cardboard tray that immediately caught my eye.  I asked if I could have them, and of course my wish was granted.  I instantly saw African masks in these trays, and an art project was born.  
Using donated mat board scraps, metallic markers, white prismacolor pencils, feathers and glue, we transformed these trays into fantastic tribal art.  I showed the students a PPT on African Masks I created, and we discussed this ancient art form and saw many visual examples before we began.  I explained that their masks needed to have symmetry, using geometric shapes and lines as much as possible, and since giving students a starting point is usually good idea, I suggested they begin with the eyes.  We talked about the different shapes of eyes they could make, then moved on down to the nose and mouth.  Once they had the basic features in place on the mask, they could add all the fun details.  
The students really got into decorating their masks.  Other decorations that could be used would be; assorted colored beans, beads, sticks, raffia, and any nature findings that would work in the design of the mask.  I only wish we had received more than 30 iPads so that more classes could have made these!

Wednesday, February 16, 2011

Good Luck Dragons


3rd Grade students made good luck dragons in honor of Chinese New Year.  Using recycled items; egg cartons, paper towel tubes and paper cups, students created an armature for their dragons.
Foil was fashioned into a tail and eyes were made from recycled paper that was balled up and taped on the head.  The next step was to paper mache the dragons' body- I gave the students a choice of red, yellow or green, but any colors would do.  Once the paper mache was dry, it was time to decorate.  This part was so much fun!  The students used metallic markers to draw the scales on the body, tissue paper fire was placed in the dragon's mouth, eyes and nostrils were painted on, and horns were made from pipe cleaners.  The wings were made from gold metallic scrapbooking paper I purchased.  The students were shown how to fan fold their triangles to create the wings, then we put glue along the top edge of the wings and dipped them into glitter, to give it an extra magical touch.  Claws were made from scraps of black construction paper.  
The students enjoyed the PowerPoint on Chinese Dragons, learned a little bit about another cultures' traditions, and had a blast creating their sculptures.  This project required three art classes, that would normally last 50 minutes, but since I don't have a class that comes in right after this one, the three classes were all extended ones.  Otherwise, this project probably would have taken about 4-5 classes to complete.  For this reason, after the second class I made these with, I saw the writing on the wall and decided to do oil pastel drawings of dragons with the rest of the third grade classes.  I'll do a post on that project soon.


Sunday, February 13, 2011

Arts Education Facts

quick facts

Did You Know?
Young people who participate in the arts for at least three hours on three days each week through at least one full year are:
  • 4 times more likely to be recognized for academic achievement
  • 3 times more likely to be elected to class office within their schools
  • 4 times more likely to participate in a math and science fair
  • 3 times more likely to win an award for school attendance
  • 4 times more likely to win an award for writing an essay or poem
Young artists, as compared with their peers, are likely to:
  • Attend music, art, and dance classes nearly three times as frequently
  • Participate in youth groups nearly four times as frequently
  • Read for pleasure nearly twice as often
  • Perform community service more than four times as often

    ("Living the Arts through Language + Learning: A Report on Community-based Youth Organizations," Shirley Brice Heath, Stanford University and Carnegie Foundation For the Advancement of Teaching, Americans for the ArtsMonograph, November 1998)
The facts are that arts education...
  • makes a tremendous impact on the developmental growth of every child and has been proven to help level the "learning field" across socio-economic boundaries
    (Involvement in the Arts and Success in Secondary School, James S. Catterall, The UCLA Imagination Project, Graduate School of Education & Information Studies, UCLA, Americans for the Arts Monograph, January 1998)
  • has a measurable impact on at-risk youth in deterring delinquent behavior and truancy problems while also increasing overall academic performance among those youth engaged in afterschool and summer arts programs targeted toward delinquency prevention

    (YouthARTS Development Project, 1996, U.S. Department of Justice, National Endowment for the Arts, and Americans for the Arts)
Businesses understand that arts education...
  • builds a school climate of high expectation, discipline, and academic rigor that attracts businesses relocating to your community
  • strengthens student problem-solving and critical thinking skills, adding to overall academic achievement and school success
  • helps students develop a sense of craftsmanship, quality task performance, and goal-setting—skills needed to succeed in the classroom and beyond
  • can help troubled youth, providing an alternative to destructive behavior and another way for students to approach learning
  • provides another opportunity for parental, community, and business involvement with schools, including arts and humanities organizations
  • helps all students develop more appreciation and understanding of the world around them
  • helps students develop a positive work ethic and pride in a job well done

    (Business Circle for Arts Education in Oklahoma, "Arts at the Core of Learning 1999 Initiative")

    Saturday, February 12, 2011

    Cityscape Collages


      5th grade students made these striking neutral collages of cityscapes as their first art project of the year.  I found it was a great way to begin the year in art, because it wasn't as intimidating as drawing is to some students, and each student could be successful with this project.  We first looked at a PPT presentation I created on  "The City in Art".  We discussed paintings of the city by various artists, what a skyline is, what makes a skyline interesting to look at besides the sheer size of the skyscrapers (the variety in the skylines' rooftops, sizes of the buildings- some tall, some shorter, the colors of the buildings), and we looked at our own Houston skyline.  I asked the students what they noticed about our citys' skyline on their trips into the city with their families, what their favorite building was and why, how tall they thought the skyscrapers were and how many windows they had, and what happens in the everyday hustle and bustle of the city (transportation, people moving from here to there, where are they going, what are they doing).
        Last, I showed them a photo taken of three buildings with different styles of architecture in Houston; the photo was of one building in front of the other, the shortest one in front, then the medium sized one in the middle and the tallest at the back.  It showed how the buildings overlap one another.  It also showed three distinct styles of architecture in our citys' history; one from the 1970's, one from the 1980's and one from the 1990's.
        Before teaching this project, I tore the cardboard layer off of sheets of cardboard scraps to reveal the corrugation.  I cut them into various sizes of rectangles.  I cut newspaper clippings into various sizes of rectangles, as well, being careful to weed out any inappropriate ads or pictures or text.  I also cut black, gray, and brown papers for buildings.  Included in our supplies were; glue, black sharpie markers, white prismacolor pencils, and scissors.
        I handed the students a brown piece of paper as their background, a gray piece of paper to tear for their road, and piled a variety of materials for their buildings in the center of their tables.  They were free to choose the papers in the sizes and colors they wanted.  I instructed the students to make interesting rooflines, overlap buildings, fill their papers up with them and most of all, make sure there was a lot of variety in their building sizes and rooflines.  I demonstrated different ways they could cut or add to their papers to create them, and told them not to be concerned with the finer details of their buildings in the beginning, that would come last.  Right now they were "building" their citys.
        Once the students had glued the buildings to their papers, it was time to add those details; windows, street scenes, billboards and signs, newspaper clouds in the sky, were some of the suggestions.  As usual, they totally blew me away with their creativity and imaginations!  This project allowed them the freedom to express their own ideas of the city and what they know and feel about it.  The wheels were spinning in their heads as they were deciding on what papers to use, what buildings they could have in their artwork, how they were going to make all the windows on their skyscrapers and what types of details they wanted to add.  I reminded them about the scale in their project; making sure they didn't make their doors or windows too large, or a sign or a person the size of a skyscraper, that they would be tiny in comparison.
        They all loved working on this project.  Not a student in the class didn't know what they wanted to do.  It was great to witness them so engaged and working with their hands and their minds to problem solve and make choices and decisions.  They also found it interesting to work with the cardboard and the newspaper, commenting they didn't know they could make art with those materials.  The recyclable aspect of the project was appealing to everyone.
        This project took about three art classes to complete.  When they were done, we had cityscapes galore and an entire school ooohing and ahhhhing over them.  They were amazed at how creative the students were and how beautiful their art was.  Since the project was such a hit, I decided to expand on this architecture theme in art and have them create 3D buildings using paper folded into right angles to make the structures of the buildings... more on this project to come.  We had to put it on hold, since I teach 9 weeks at a time at each of my two campuses.  It was time for me to go to my other campus, so we put away our buildings until I return... that's life in the big city!